Reactions
This page is still being edited and reviewed.
Meaning
The element Reactions can be used to summarize all actions that involve several substances, materials or chemicals. Samples are always an essential part of reactions. In general, the more carefully the Chemotion ELN user documents the use of samples and differentiates between the individual actions (e.g. use of split and copy), the easier it is to document reactions and analyze the individual influences on a successful reaction.
Naming
Reactions are numbered consecutively and displayed in the list of reactions in reverse order. The reaction name is preceded by the abbreviation of the Chemotion ELN owner such that reactions can be clearly identified. If you want to assign another name to the reaction, you can do this by making an entry in the Name field within the Scheme tab or Properties tab.
Generation
Reactions can be generated from the action bar by pressing and choosing Create Reaction.
If the user is in the reaction tab, the action button for adding is already set up accordingly to adding reactions.
It looks like this  ,
and you can make the selection directly.
,
and you can make the selection directly.
Once a reaction is generated, its details panel is displayed, and the user can fill the reaction with the interacting samples and the resulting products from within the Scheme tab. More details about populating a reaction with samples can be found in the Details panel for reactions chapter.
Reactions in the element bar
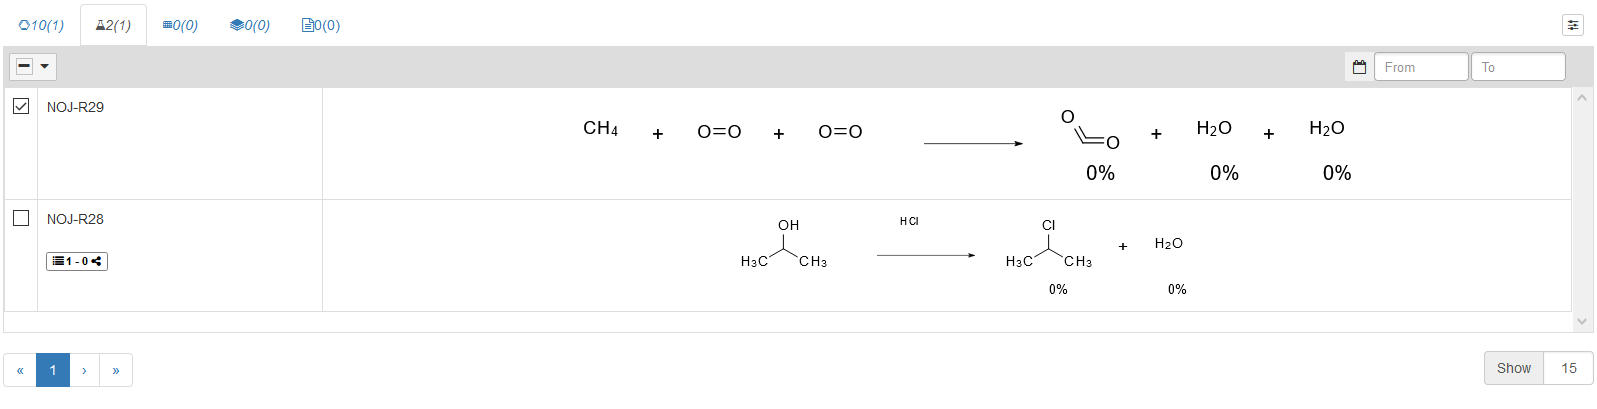
In the element bar, the reaction tab has the symbol . The number right next to the reaction symbol indicates the number of reactions within the selected collection. The number in parentheses shows the number of selected reactions within the collection. The reactions list shown in the figure above appears when the Chemotion ELN is opened if no detail level has been selected. When selecting the level of detail by selecting a reaction, the reactions list is reduced and the details panel appears.
The view of the reactions list differs from the view of samples list mainly by the absence of the gray and white areas as there is only the possibility to copy reactions, with no other similar yet different functions such as Split in case of samples. On the right-side of each reaction, there's a cross to enable dragging & dropping of reactions. In case other elements are available to drop reactions within them (such as a research plan), the cross is colored in blue to indicate that it is active, otherwise, it appears in gray, and it can be used in this case.
The user can filter their reaction either by creation date, or update day.
The image above shows a calendar icon  which corresponds to a filter by creation date.
Next to the calendar are the fields From and To.
Clicking on them opens a calendar for the user to pick the desired days.
Pressing on the calendar icon switches to filter by update date,
and here the calendar appears like this
which corresponds to a filter by creation date.
Next to the calendar are the fields From and To.
Clicking on them opens a calendar for the user to pick the desired days.
Pressing on the calendar icon switches to filter by update date,
and here the calendar appears like this  .
.
Another method for filtering is using text search or structure search from the toolbar. More details about those methods can be found in the Toolbar page.
By clicking on the reaction list, a details panel for reactions opens on the right side.
Gas Phase Reaction Scheme
The new Gas Phase Reaction Scheme feature introduces a mode to handle reactions involving gaseous reactants and products. This feature allows users to input and calculate parameters specifically for gas-phase reactions, differing from the default reaction mode that is typically used for liquid or solid phases.
Key Features:
Selection Toggle Button: Users can select between the Default mode (for liquid/solid phases) and the new Gas mode via a toggle button:
- Default Mode: Operates as a default mode, where inputs and calculations are based on liquid or solid reactants.
- Gas Mode: Introduces new fields and buttons tailored for handling gas-phase reactions.
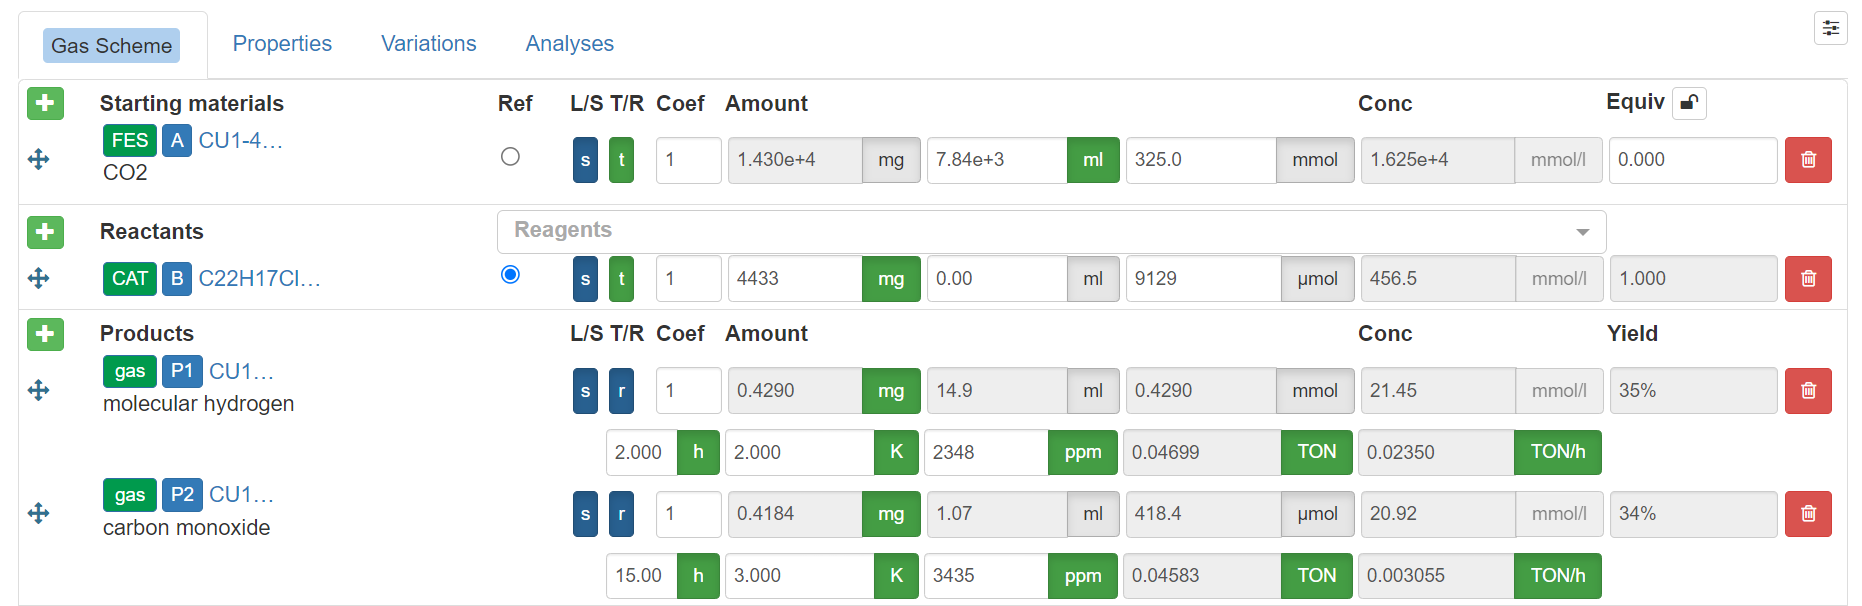
UI Changes in Gas Mode: When Gas Mode is selected, the UI will display additional options and fields specific to gas reactions. Each sample (starting material, reactant, or product) gets an extra button:
- FS (Feedstock): Appears for all starting materials and reactants. When selected, it sets the sample as a feedstock gas.
- CAT (Catalyst): Appears for all starting materials and reactants. When selected, it sets the sample as a catalyst.
- Gas: Appears for all products. When selected, it expands the UI to include five additional fields: Time, Temperature, Part Per Million (ppm), Turnover Number (TON), and Turnover Frequency (TOF).
- Off: Appears as a default option for all samples. It means that the sample is none of the above options (neither feedstock, catalyst, nor gas)
Input Fields for Gaseous Products:
Upon selecting the gas button for a product, additional fields are displayed:
- Time: The duration for which the reaction is carried out to prepare the relative product.
- Temperature: Temperature of the reaction, input in °C, °F, or K.
- ppm (Part Per Million): Concentration of the gas in parts per million.
- TON (Turnover Number): Calculated as the ratio of moles of product to moles of reference (catalyst).
- TOF (Turnover Frequency): Calculated as the ratio of TON to time.
Further Equations: It is important to mention that certain calculations differ when operating in Gas Phase mode. The following equations are applicable exclusively under these gas phase conditions and use the following constants:
- Pressure in atm = 1
- Volume in L
- Number of moles in mol
- Ideal gas constant (R) = 0.0821 atm L/(molK)*
- Temperature in K
- default temperature (defined as 294)
- parts per million factor (1000000)
Equations:
- Calculation for moles of gas product equation: N = part per million * pressure * reaction vessel volume / (R * temperature (entered in temperature field) * parts per million factor)
- Calculation for moles of feedstock reference: purity * pressure * volume of feedstock / R * default temperature
- Yield Calculation for gas products: this is the ratio of product moles to feedstock moles (using reaction vessel volume instead of feedstock volume). Substituting the values into the equation, the yield can be calculated as follows:
- part per million * default temperature / purity * parts per million factor * temperature (entered in temperature field)
User Interface Functionality: The system automatically recalculates and synchronizes data for the input fields as necessary information is entered. For product samples, click the gas button to expand the input fields. enter the Temperature, reaction vessel size, Time, and part per million value of the product gas. Using the values entered for the input fields of moles for catalyst and feedstock samples, the system will automatically calculate:
- The amount of the product in moles
- The Turnover Number (TON)
- The Turnover Frequency (TOF)
- The product yield
Aside from the functionalities mentioned above, all other features of the default reaction scheme remain fully available when using the gas mode scheme.
Weight Percentage Reaction Scheme
The Weight Percentage Reaction Scheme provides an alternative equivalent basis to the existing molar-equivalents workflow. It allows users to assign amounts by mass directly (for example, aiming for a 10 g product composed of 70:30 wt% B:A).
What changes in the UI
- Equivalent/Weight percentage selector: Every material that previously showed an equivalents selector (molar equivalents) now offers a dropdown to choose the equivalent basis:
- Molar equivalents (default)
- Mass-based equivalents / Weight percentage (wt%)
- Mode toggle: Users must enable the Weight Percentage mode for the scheme. Enabling this mode activates the mass-based calculation UI and reveals the weight-percentage-specific controls.
- Reference product: When weight-percentage mode is active the material sample that serves as the weight reference must be selected. The target amount of the reference material defines the combined amounts of the other materials which have wt% values applied to it.
How it works (step-by-step)
- Activation of weight percentage mode
- User switches the scheme into Weight Percentage mode using the mode toggle. This enables the weight-percentage controls.
- Assignment of reference material:
- The user selects one material as the weight-percentage reference material, by selecting either one of the check boxes in the ref column of any of the product materials, or one of the reactant or starting materials (the outer check box of the ref column). Upon selection, it will be highlighted in green.
- The user enters a target amount for that reference material. All weight percentage based calculations use this target mass as the basis.
- Weight percentage fields
- At a result, changing the weight percentage (wt%) input field is enabled for starting materials and reactants.
- The weight percentage input field can take value ratios between 0 and 1 (0%–100%) which indicates the fraction of the reference material mass assigned to that sample.
- Validation rules
- Weight percentage inputs accept values in the closed interval [0, 1].
- A warning notification will be triggered if a non allowed value (for example, < 1 or > 1) is entered in the weight percentage field input for a material.
- Automatic recalculation of amounts
-
When a wt% value is entered or the reference target mass changes, the system synchronizes the mass amount for the respective materials by triggering automatic recalculation.
-
Formula used: amount of sample = target amount of reference material * weight percentage of sample
-
Example: For a 10 g reference material with A=0.30 and B=0.70, the system computes real and target amount of A = 10 g * 0.30 = 3 g and amount of B = 10 g * 0.70 = 7 g.
-
A material can use wt% as its equivalent basis while another material can still be defined in molar equivalents (for example, catalysts or additives defined in molar equivalents relative to a chosen reference).
-
Assigning weight percentage value for a material will remove any assigned molar equivalents for the same material, unless this material is selected as reference for molar equivalents.
Example scenario
- Target amount: 10 g polymer (weight percentage reference product)
- Materials and inputs:
- A: wt% = 0.30 → computed mass = 10 g * 0.30 = 3 g
- B: wt% = 0.70 → computed mass = 10 g * 0.70 = 7 g
- C: 0.01 molar equivalents with respect to B
This setup allows users to directly assign mass percentages and still keep molar relationships where required.
Notes and edge cases
- If no reference product is selected while in weight-percentage mode, the wt% controls remain disabled and the UI prompts the user to select a reference.
- If users enter wt% that sum to zero, or all zero, the system treats components as having no assigned mass.
Acceptance criteria
- A dropdown exists to choose between molar and wt% equivalents for materials.
- A mode toggle activates weight percentage mode.
- A reference material sample can be selected and assigned a target mass.
- wt% fields are enabled only for starting materials and reactants and accept values in [0,1].
- Amounts get recalculatd automatically using the formula above when wt% or the reference target mass change.